Waterproofing & Sealants
Why Balconies and Decks Leak at the Edges First: Deck-to-Wall, Threshold, and Railing-Post Detailing for South Florida Condos
A South Florida condo balcony rarely leaks in the open middle. It leaks at the wall, the sliding-door threshold, and the railing posts. Here's how those three transitions are actually built, why they fail on the coast, and why re-detailing the perimeter (not re-coating the field) is the real fix.
Beachfront Commercial Services ·
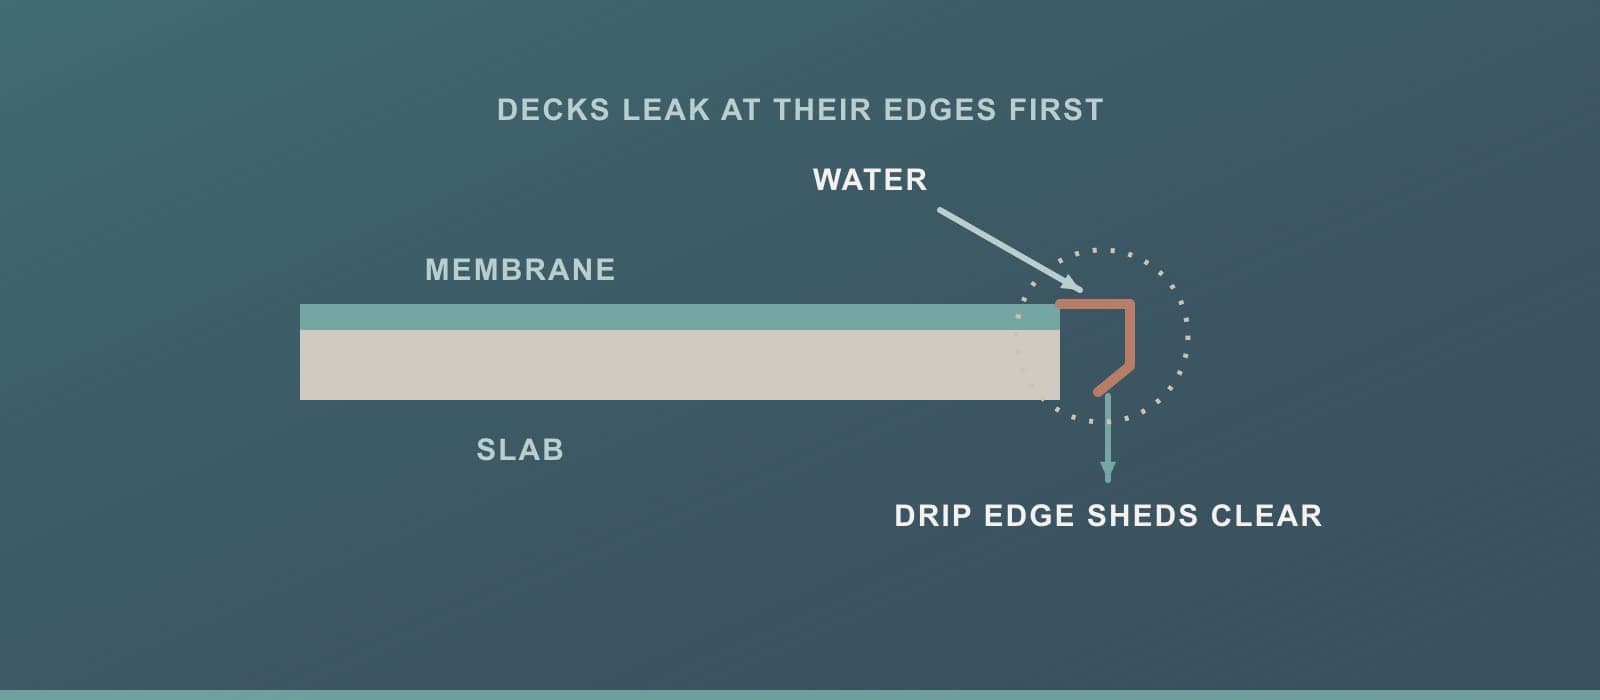
Almost every balcony and deck leak in a South Florida condo starts at an edge or a penetration (the wall the deck runs into, the sliding-door threshold, or the railing posts), not in the open field of the surface. Those three spots are where the waterproofing membrane has to stop, turn a corner, or get pierced, and that is where water finds its way in. It is why a board can pay to have a balcony re-coated, watch the same ceiling stain reappear in the unit below three months later, and never understand what went wrong: the coating in the middle was never the problem. The termination detail at the perimeter was.
This guide walks condo and HOA boards, community association managers (CAMs), and commercial building owners across Palm Beach, Broward, and Miami-Dade through the three highest-risk balcony details, how each one is supposed to be built, why the coast is so hard on them, and how a licensed waterproofing and concrete-restoration contractor decides whether to re-detail an edge or open it up completely. It ties directly into how a milestone inspection (§553.899) and a Structural Integrity Reserve Study (SIRS, §718.112(2)(g)) look at your building, because inspectors look hardest at exactly these transitions.
A quick note on scope: this is general educational information for boards and managers, not engineering advice. Balcony and structural repairs on a Florida condominium should be scoped by a licensed contractor and, where the structure is involved, a Florida-licensed engineer.
Why the perimeter leaks and the field usually doesn't
A waterproofing membrane, whether it is a liquid-applied traffic coating (ASTM C957), a sheet membrane, or the hidden layer under tile (ANSI A118.10), is very good at one job: shedding water off a flat, continuous surface that slopes to drain. Out in the open middle of a deck, there is nothing for water to exploit. The membrane is monolithic, it is sloped (a proper deck falls at least ¼ inch per foot to a drain or edge), and water simply runs off.
The trouble starts everywhere the membrane has to end, change direction, or let something pass through it:
- Where the deck meets a wall, the horizontal membrane has to turn 90 degrees and run up a vertical surface, then hand off to whatever protects the wall above it.
- Where the deck meets a door, the membrane has to terminate into an opening that people walk through, an opening that sits lower than the room behind it.
- Where a railing post lands, something rigid gets anchored down through (or right next to) a membrane that is supposed to be continuous.
Every one of those is a termination, and in waterproofing the rule of thumb is blunt: most leaks happen at terminations, not in the field. Add the coast's constant movement (thermal expansion, wind load flexing the railings, structural deflection, occupants) and the seams and seals at those transitions are worked loose thousands of times a year. That is why an experienced contractor asked to fix a balcony leak does not start with a bucket of coating. They start at the edges.
Detail 1: the deck-to-wall transition
The joint where a balcony deck meets the building wall is the single most common place a coastal balcony leaks. On paper it is simple; in practice it is where corners get cut.
How it is supposed to work. The deck membrane should not just stop where it hits the wall. It has to be carried up the wall as a cove or base flashing, generally a minimum of about 6 inches vertically, so there is no horizontal seam sitting right at the base of the wall where water collects. That vertical leg then has to be integrated behind whatever sheds water down the wall above it (the wall's water-resistive barrier, stucco system, or coating) in a weatherboard (shingle-lap) fashion, so upper layers always lap over lower ones and water is directed outward at every step. A common manufacturer spec calls for flashing of roughly 4 inches by 6 inches at wall-to-deck junctions, with self-adhered flashings lapping at least 2 inches onto the deck membrane and the wall barrier lapped over the membrane's vertical leg.
How it fails. The failure is almost always that the coating or membrane simply stopped at the wall: troweled up to the base of the stucco and caulked, with nothing carried up behind the wall finish. A bead of sealant at that corner is not a flashing; it is a maintenance item with a short life, and once it shrinks or debonds, every drop that runs down the wall in a wind-driven rain is delivered straight into the top of the deck assembly and behind the membrane. On coastal buildings you will also see missing counterflashing or kick-out flashing where a deck meets a wall that continues past it, dumping a concentrated stream into the wall cavity.
Because this joint hides behind the finish, boards often cannot see the defect. They only see the stain inside. A proper repair re-establishes the up-the-wall termination and its shingle-lap into the wall system; it does not just re-coat the deck and re-caulk the corner.
Detail 2: the door and sliding-glass-door threshold
If deck-to-wall is the most common leak, the door threshold is the one that does the most expensive damage, because it delivers water directly into the interior finished floor and, on stacked balconies, straight into the unit below.
How it is supposed to work. Under every exterior door and slider there should be a formed metal or membrane door pan (sill pan) flashing. Think of it as a shallow tray with a back-dam (a raised lip on the interior side) and end-dams (raised lips at each side) that catches any water that gets past the door and drains it back out to the positive exterior of the waterproofing. Two elevation rules make it work: the interior finished floor must sit higher than the exterior deck, and the deck should sit low enough that there is a meaningful upstand (a common minimum is about ¾ inch of threshold above the deck surface) so that ponding or wind-driven water cannot simply run over the sill. The deck membrane terminates into the pan, and hem flashing is set under the door, so the whole assembly hands water outward.
How it fails. The most damaging version is simple: there is no pan under the slider at all. Because the pan is hidden the moment the door is set, no one knows it is missing until water shows up on the kitchen or bedroom ceiling of the unit below. Other failures include a threshold set flush with (or below) the deck so there is no upstand, an interior floor built up level with the exterior, a pan with no end-dams so water runs out the sides into the wall, or the deck membrane caulked to the door instead of terminated into a pan that actually drains. In South Florida, where a summer squall drives rain horizontally against a slider for twenty minutes at a time, any one of these turns the threshold into a funnel.
This is also the detail most likely to blur the who-pays line, because the damage lands in someone else's unit. More on that below.
Detail 3: railing-post penetrations
Railings exist for life safety, and on a coastal high-rise they take a beating from wind. Unfortunately, the way many are attached is the worst possible thing you can do to a waterproofed deck.
The problem with drilling through the membrane. When a railing base plate is surface-mounted on top of a finished, waterproofed deck, bolted down through the horizontal membrane after the fact, you have drilled a hole through the one continuous layer that was keeping water out. Water follows the easiest path down through an assembly, and the easiest path is a bolt hole. Worse, railings are never truly still: they flex under wind load, people leaning on them, and thermal expansion, thousands of small movements a year. A rigid fastener transfers all of that movement into the sealant around it, and hairline cracks radiate out from the base of the post. Any sealant used to "waterproof" a base plate is therefore a maintenance-dependent detail with a limited life, not a permanent fix.
The better options. There are two durable approaches:
- Face-mounted railings attach to the vertical fascia or edge below the deck surface, so the horizontal membrane is never penetrated. This keeps the deck intact, but it moves the fasteners onto the building's vertical face, which then has to be detailed and sealed properly, because you have simply relocated the penetration.
- Cast-in or embedded posts (the gold standard) anchor a stanchion or sleeve to the structural substrate before the concrete topping is poured, seal it at the membrane, and encase it in the pour. After the slab cures, the railing post slides over the embedded stanchion and locks with set screws: no bolts through the finished surface at all. This is the detail you specify on any new deck or full balcony rebuild.
For a board, the practical takeaway is this: if your railings are bolted flat onto the top of the deck and the bases are caulked, that is a known leak path, and re-caulking it is a temporary measure, not a repair.
Why the South Florida coast makes all three worse
Every balcony in the country has these three details. Coastal South Florida just punishes them harder, and turns a small detailing defect into structural repair faster:
- Salt and chloride. Airborne salt drives chloride into any crack or open joint at these transitions. Once chloride reaches the reinforcing steel in a concrete balcony, it corrodes the rebar; the rust expands, and the concrete spalls, which widens the very joint that was leaking. A hairline detail failure and a corrosion problem feed each other.
- Wind-driven rain. Hurricane season (June 1–November 30) and near-daily summer storms push water horizontally and upward against thresholds and wall transitions in ways a gentle vertical rain never would, defeating details that would survive in a milder climate.
- UV and heat. Intense UV and daily thermal cycling age exposed sealants and coatings at the edges, exactly where the assembly can least afford a shrinking bead.
- Movement. Thermal expansion and structural deflection keep every joint working, so a detail that relies on a static seal instead of a lapped, drained, mechanical termination will eventually open.
This is why the highest-stress joints on any balcony (wall-to-floor transitions, drain collars, and railing-post penetrations) are the ones a coastal contractor inspects first, and why "positive drainage" (a real slope to a real outlet, minimum ¼ inch per foot) is non-negotiable: standing water at a compromised edge is just pressure looking for a path.
Who pays, and how this ties into milestone and SIRS
On most Florida condominiums, a balcony is a limited common element: attached to one unit but part of the building's structure and envelope. Your declaration controls who maintains and repairs what, and the pattern most boards land on is that the association owns the structural deck, the waterproofing, and the railings, while the owner handles the walking-surface finish and cosmetics. But here is the catch that these edge details create: even when the surface is the owner's responsibility, the leak frequently originates in the association's layer: the flashing at the wall, the door pan, or the railing penetration. When water then damages the unit below, Florida Statute Chapter 718 governs the water-damage responsibility, and getting the source correctly diagnosed by a qualified contractor is what determines who actually pays.
These details also sit at the center of Florida's post-Surfside compliance regime. A milestone inspection under §553.899 (Phase 1 at 25 years within 3 miles of the coast, 30 years inland) and the SIRS under §718.112(2)(g) are both aimed squarely at the building's structure and waterproofing, and balcony perimeters and penetrations are exactly where an inspector probes, because that is where water reaches the rebar. A board that documents a proactive re-detailing program, with the corrected terminations photographed and dated, feeds a defensible remaining-useful-life (RUL) number into the reserve study instead of a guess. A longer, documented RUL is what keeps a component's reserve contribution reasonable.
Re-detail the edge, or open it up? How the decision is made
Not every perimeter leak requires tearing a balcony down to the slab. A licensed waterproofer works through roughly this sequence:
- Find the actual source. Water travels; the stain below is rarely under the defect. A proper diagnosis traces the leak to the specific transition (wall, threshold, or post), often with water testing rather than guesswork.
- Check whether the concrete is still sound. Sound the deck edge and slab for drummy (delaminated) areas and rust staining. If chloride-driven corrosion has already spalled the concrete at the joint, that structural repair (per ICRI/ACI methods) has to happen first. You cannot re-flash a crumbling edge.
- Re-detail the termination. On a sound substrate, the fix is to rebuild the specific detail correctly: carry the membrane up the wall and lap it into the wall system; install a properly dammed, draining door pan and set the right threshold upstand; convert surface-mounted railings to face-mounted or embedded, or at minimum re-detail the base with the understanding that a bolted-through post is a compromise.
- Only tear off the field when the field has actually failed. A full membrane replacement is warranted when the field membrane is genuinely at end of life or when so many edges have failed that piecemeal re-detailing no longer makes sense, not as a reflex for a leak that lives at one transition.
Where Beachfront fits
Beachfront Commercial Services is a licensed, insured South Florida contractor (DBPR CGC #1537131 · CCC #1333921 · CCC #1333373) that self-performs both the waterproofing and the concrete restoration these repairs require. That matters at the edges specifically: when a leaking deck-to-wall joint has already started to spall the slab, one crew can repair the corroded concrete and rebuild the waterproofing termination in the correct sequence, instead of a coating sub re-coating over a structural problem, or a repair sub patching concrete no one then waterproofs. We install certified-applicator systems (Sika, Tremco, Pecora and others), detail the terminations to manufacturer and code requirements, and document the corrected details so they support your milestone and SIRS record rather than becoming next year's stain.
If your building has recurring balcony leaks that "keep coming back after we coated them," the odds are strong the coating was never the issue. The perimeter was.
Frequently Asked Questions
Why does my balcony keep leaking after we had it re-coated? Because the leak is almost certainly at a transition, not in the field that got re-coated. Re-coating the open surface does nothing for a failed deck-to-wall flashing, a missing door pan, or a railing bolted through the membrane. Until the specific termination is re-detailed, the same stain returns. A proper diagnosis traces the water to the actual edge or penetration before any coating goes down.
Water is coming in under my sliding-glass door and dripping into the unit below. What causes that? Most often a missing or improperly installed door pan (sill pan) flashing, combined with a threshold set too low relative to the deck. The pan is a hidden tray with dammed sides that catches water and drains it back outside; without it, or without enough threshold upstand above the deck, wind-driven rain runs straight over the sill and into the floor assembly. It is invisible once the door is set, which is why owners usually discover it only when a leak appears below.
Are railing posts really a common source of balcony leaks? Yes. Base plates bolted down through the top of a waterproofed deck are one of the most common leak paths there is. The bolt holes pierce the membrane, and because railings flex constantly in coastal wind, the sealant around them cracks. The durable fixes are face-mounted railings (attached to the vertical edge, not the deck top) or cast-in/embedded posts set before the concrete is poured, so nothing penetrates the finished surface.
Who is responsible for a leaking balcony in a Florida condo, the owner or the association? It depends on your declaration, since a balcony is usually a limited common element, but the common pattern is that the association owns the structure, waterproofing, and railings while the owner owns the surface finish. Critically, many leaks originate in the association's layer (flashing, pan, or penetration) even when the surface is the owner's, and Florida Statute 718 governs damage to the unit below. Getting the leak source correctly diagnosed is what settles who pays.
Can these edge details be fixed without tearing the whole balcony apart? Usually, yes, if the concrete underneath is still sound. On a sound slab, a contractor can re-detail the specific failed transition (rebuild the wall termination, install a proper door pan, correct the railing attachment) without replacing the whole deck. If chloride corrosion has already spalled the concrete at the joint, that structural repair has to come first. A full field tear-off is reserved for a membrane that is genuinely at end of life or a perimeter that has failed comprehensively.
Ready to Protect Your Property?
Tell us about your building and a Beachfront estimator will follow up with a clear scope and fair pricing.